TM 11-6625-3081-23
2-38.1 DISC/TAPE DRIVE ASSEMBLY 1A1O REPLACEMENT (cont)
2-38.1
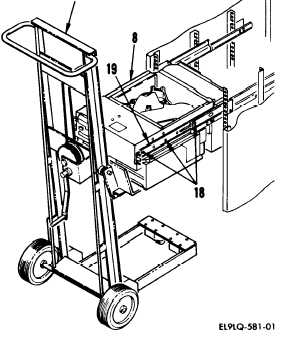
21. Position chassis lift (17) with
disc/tape drive (8) in front of
electronic station.
22. Raise disc/tape drive assembly above
slide rails (19). Ensure drive
assembly is high enough so that slide
rails can be extended.
23. Extend slides (19) out of electronic
station.
24. Aline slide rail guide pins to
disc/tape drive and lower disc/tape
drive onto slide rails.
25. Install screws (18) to secure slide
rails to disc/tape drive assembly.
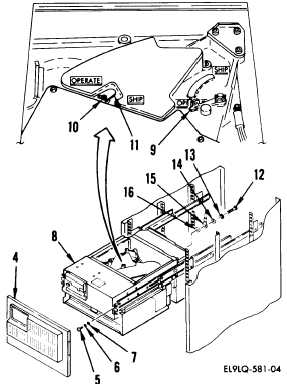
26. Unlock actuator by moving actuator
lever (9) to OPERATE.
27. Loosen screw (10) and move spindle
lock lever (11) to OPERATE.
28. Tighten screw (10) to 20 in-lb.
29. Push disc/tape drive assembly (8)
into cabinet and install four screws
(5), lockwashers (6), and
washers (7).
30. Install front panel (4).
31. Install chain with screw and washer.
32. Prepare surface and hardware (12 thru
16) for application of zinc chromate
primer (para 2-19).
33. Install ground lead (15) with washers
(16 and 14), lockwasher (13), and
screw (12).
2-234.4
Change 4